

Path Builder
Add courses to a learning path, set their order, mark them required or optional, and publish the path to learners.
Path Builder
The Path Builder is where you assemble a learning path from your existing course catalog, arrange the courses in the right order, and publish the path for learners to enroll in.
Before you start
- You need the Admin role. The Learning Paths admin module is currently Admin-only.
- The learning path must already exist. If you just created it, Arythmatic takes you to the builder automatically. Otherwise navigate to Learning Paths → ⋯ → Open Builder.
- At least one published course must exist in your workspace to add to the path. Create courses first if none exist.
Opening the builder
There are three ways to open the Path Builder for an existing path:
- In the grid view, click the Open Builder button on a path card.
- In the list view, click the ⋯ menu on a path row and select Open Builder.
- Navigate directly to
/dashboard/learning-paths/<id>/builder.
The two-panel layout
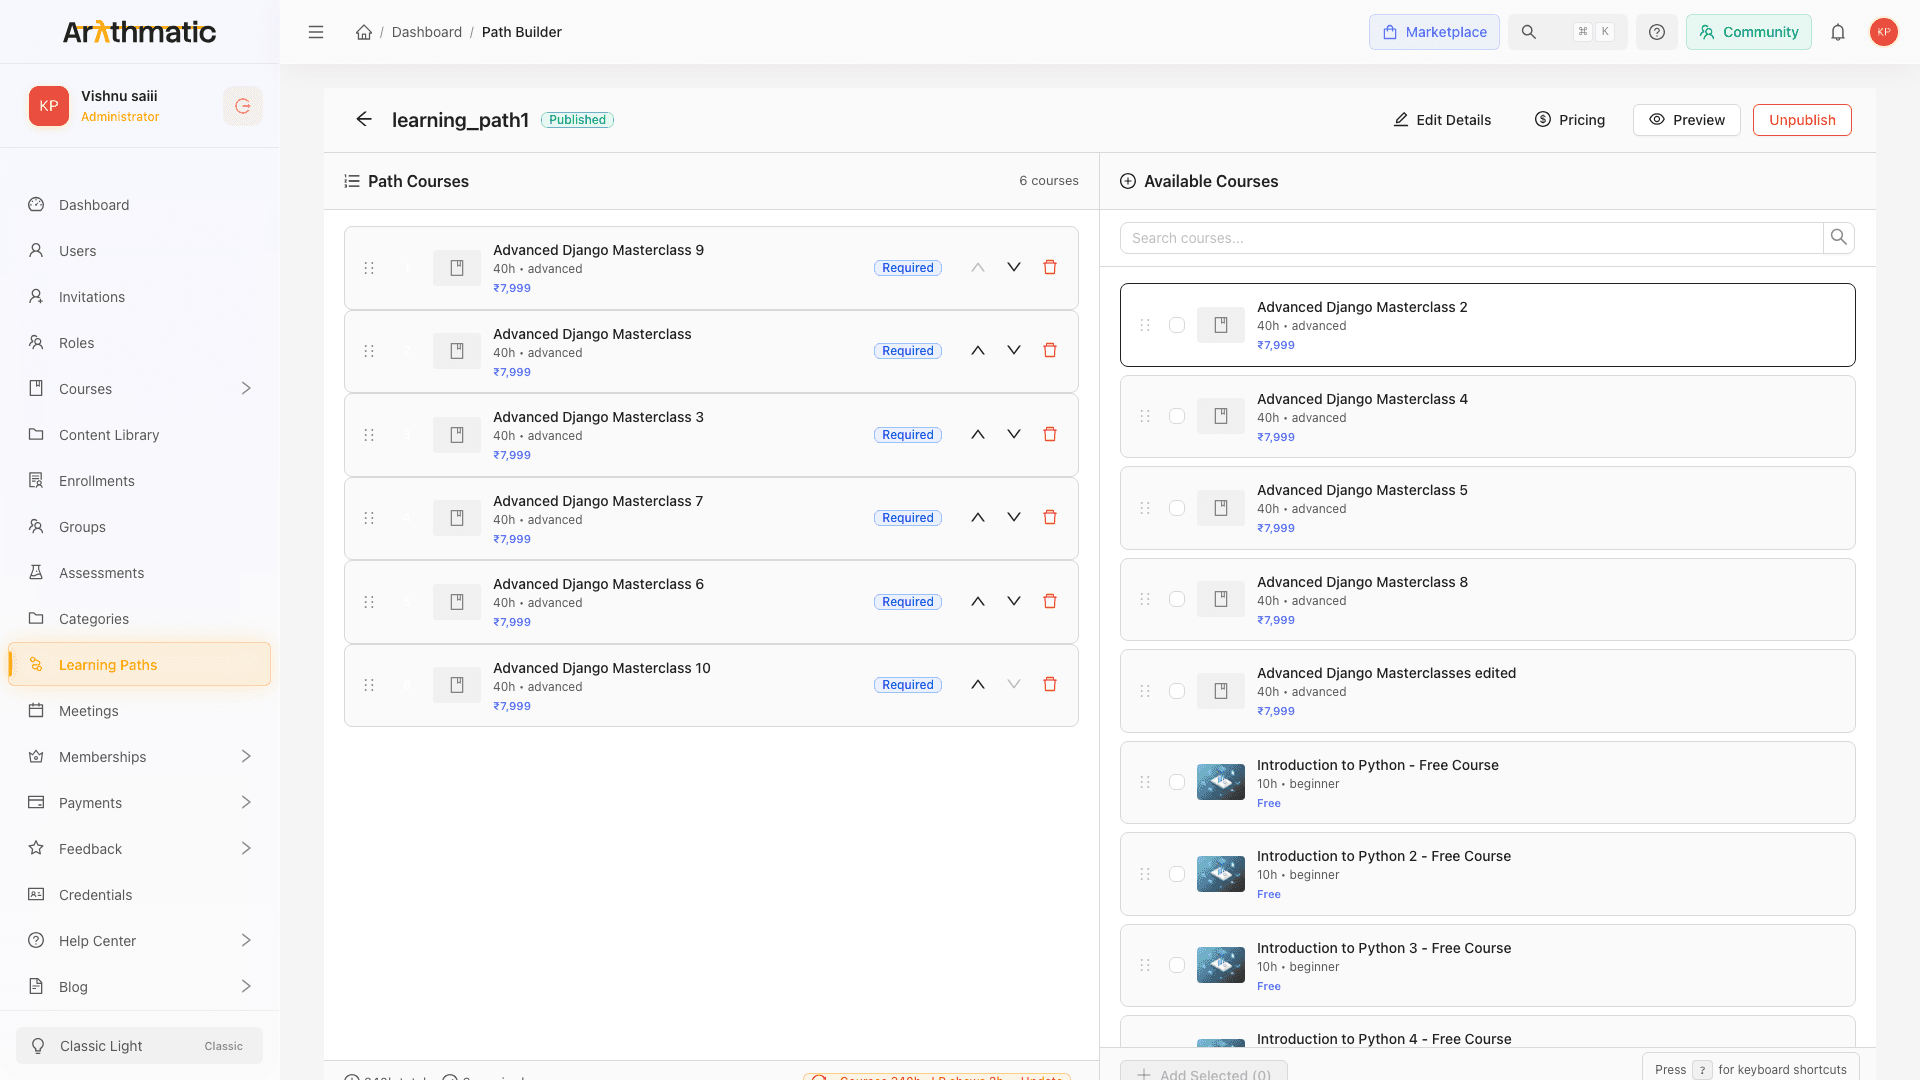
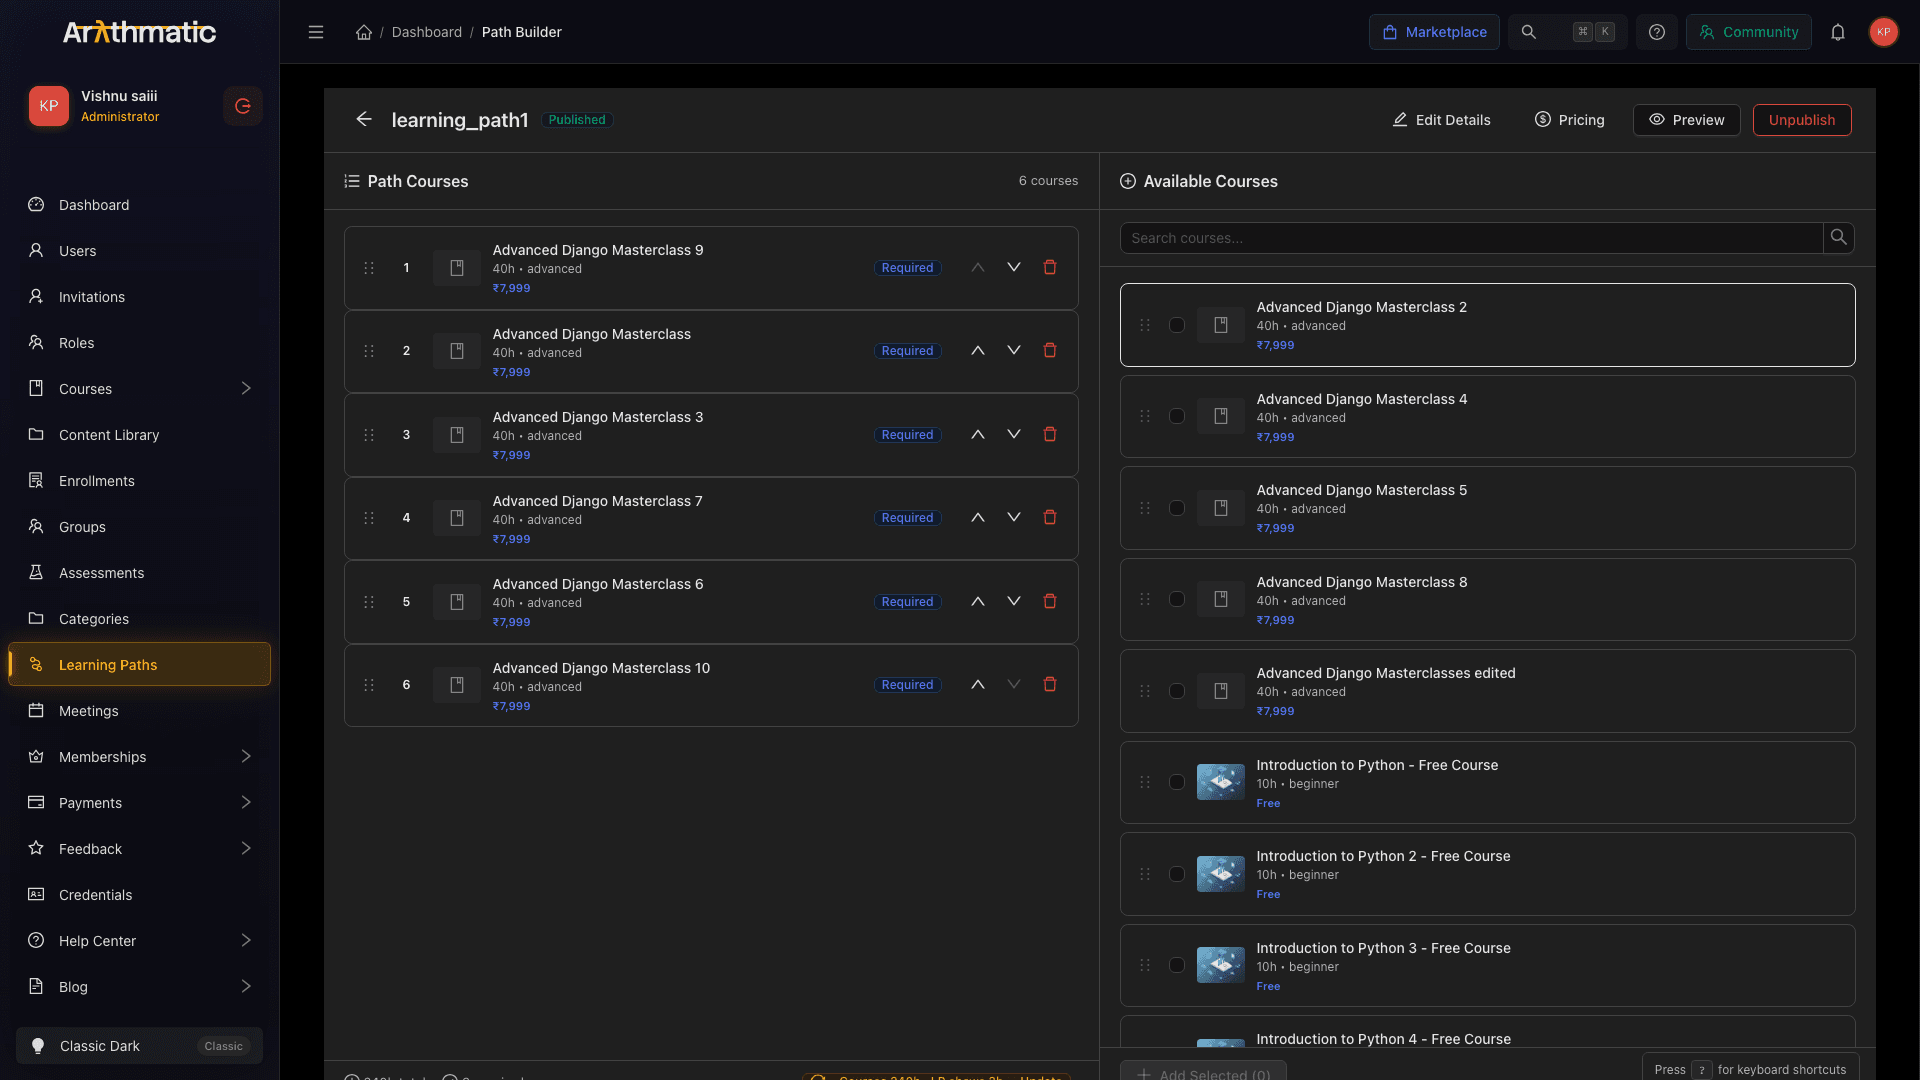
The builder splits into two panels:
| Panel | Purpose |
|---|---|
| Left — Path Courses | Shows the courses currently in the path, in order. This is what learners will see. |
| Right — Available Courses | Shows all published courses in your workspace that are not yet in the path. |
Adding courses to the path
Method 1 — Checkbox + Add Selected
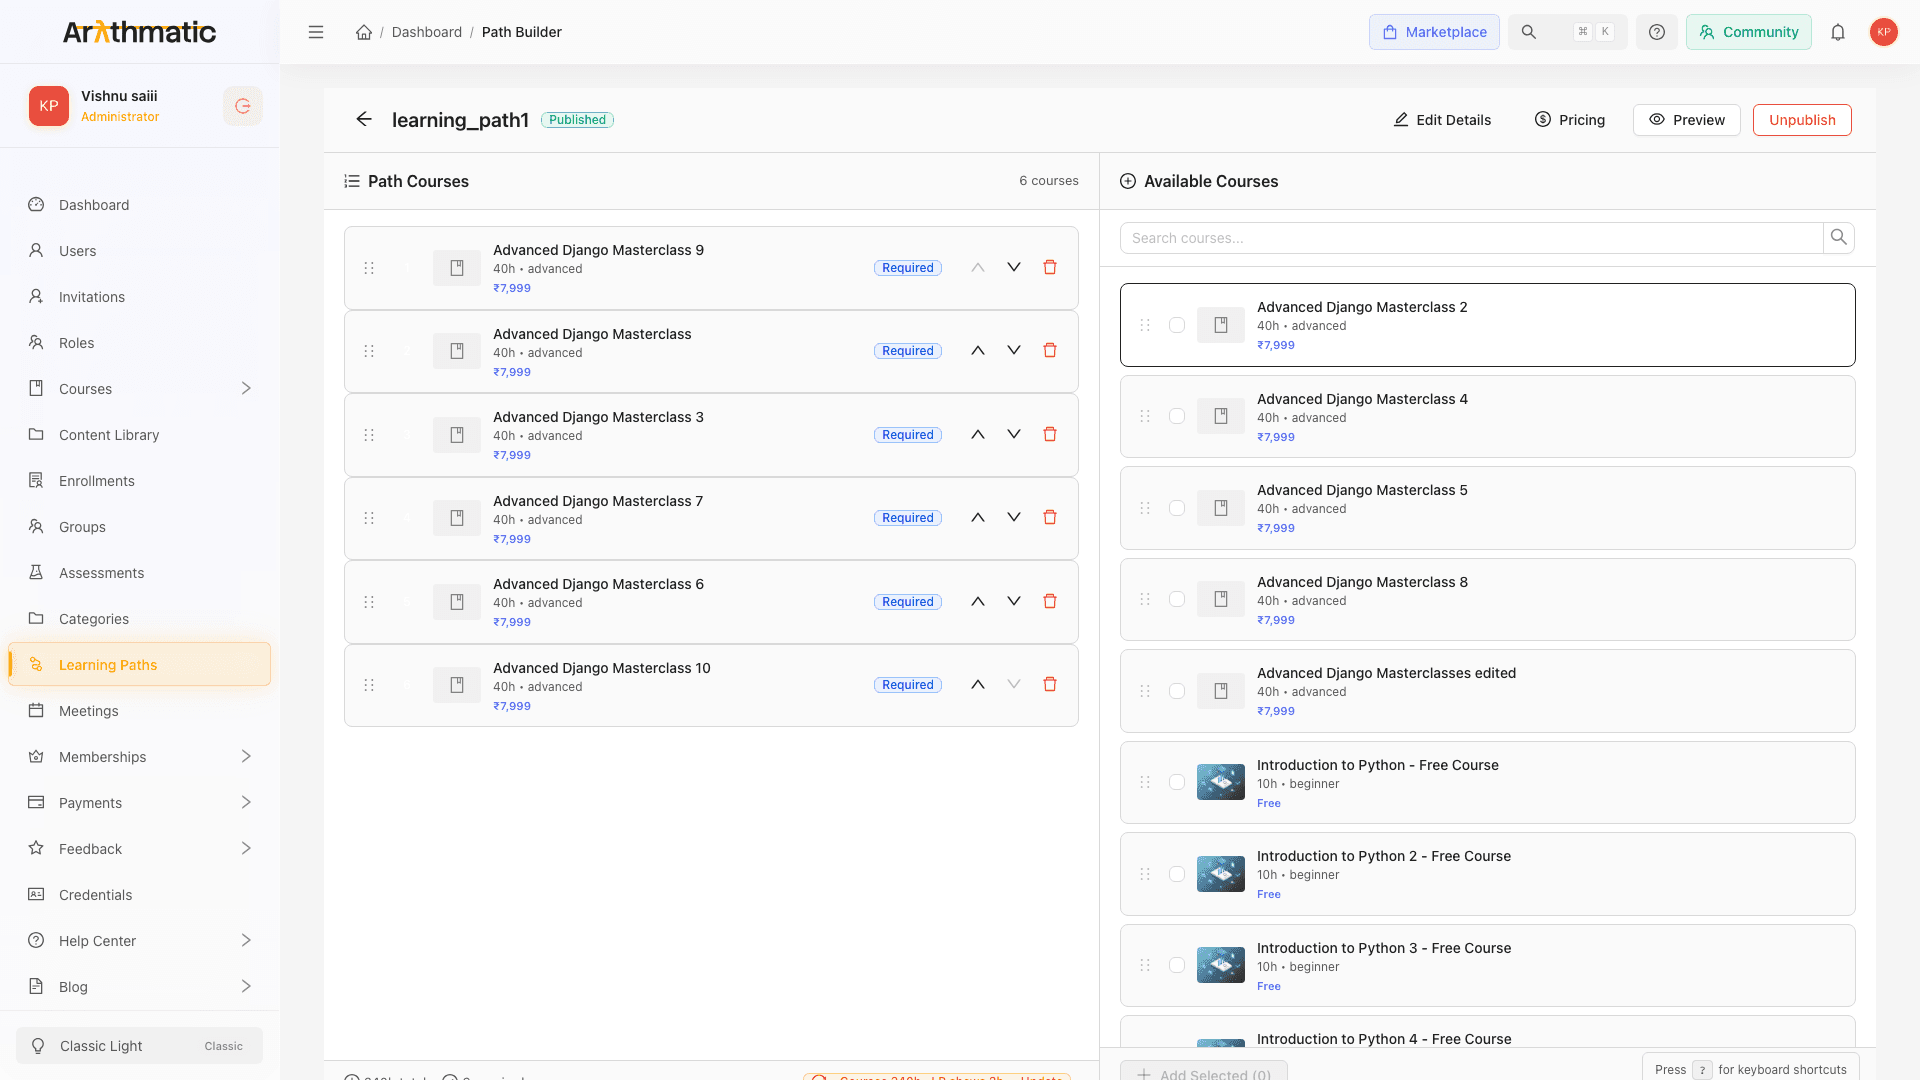
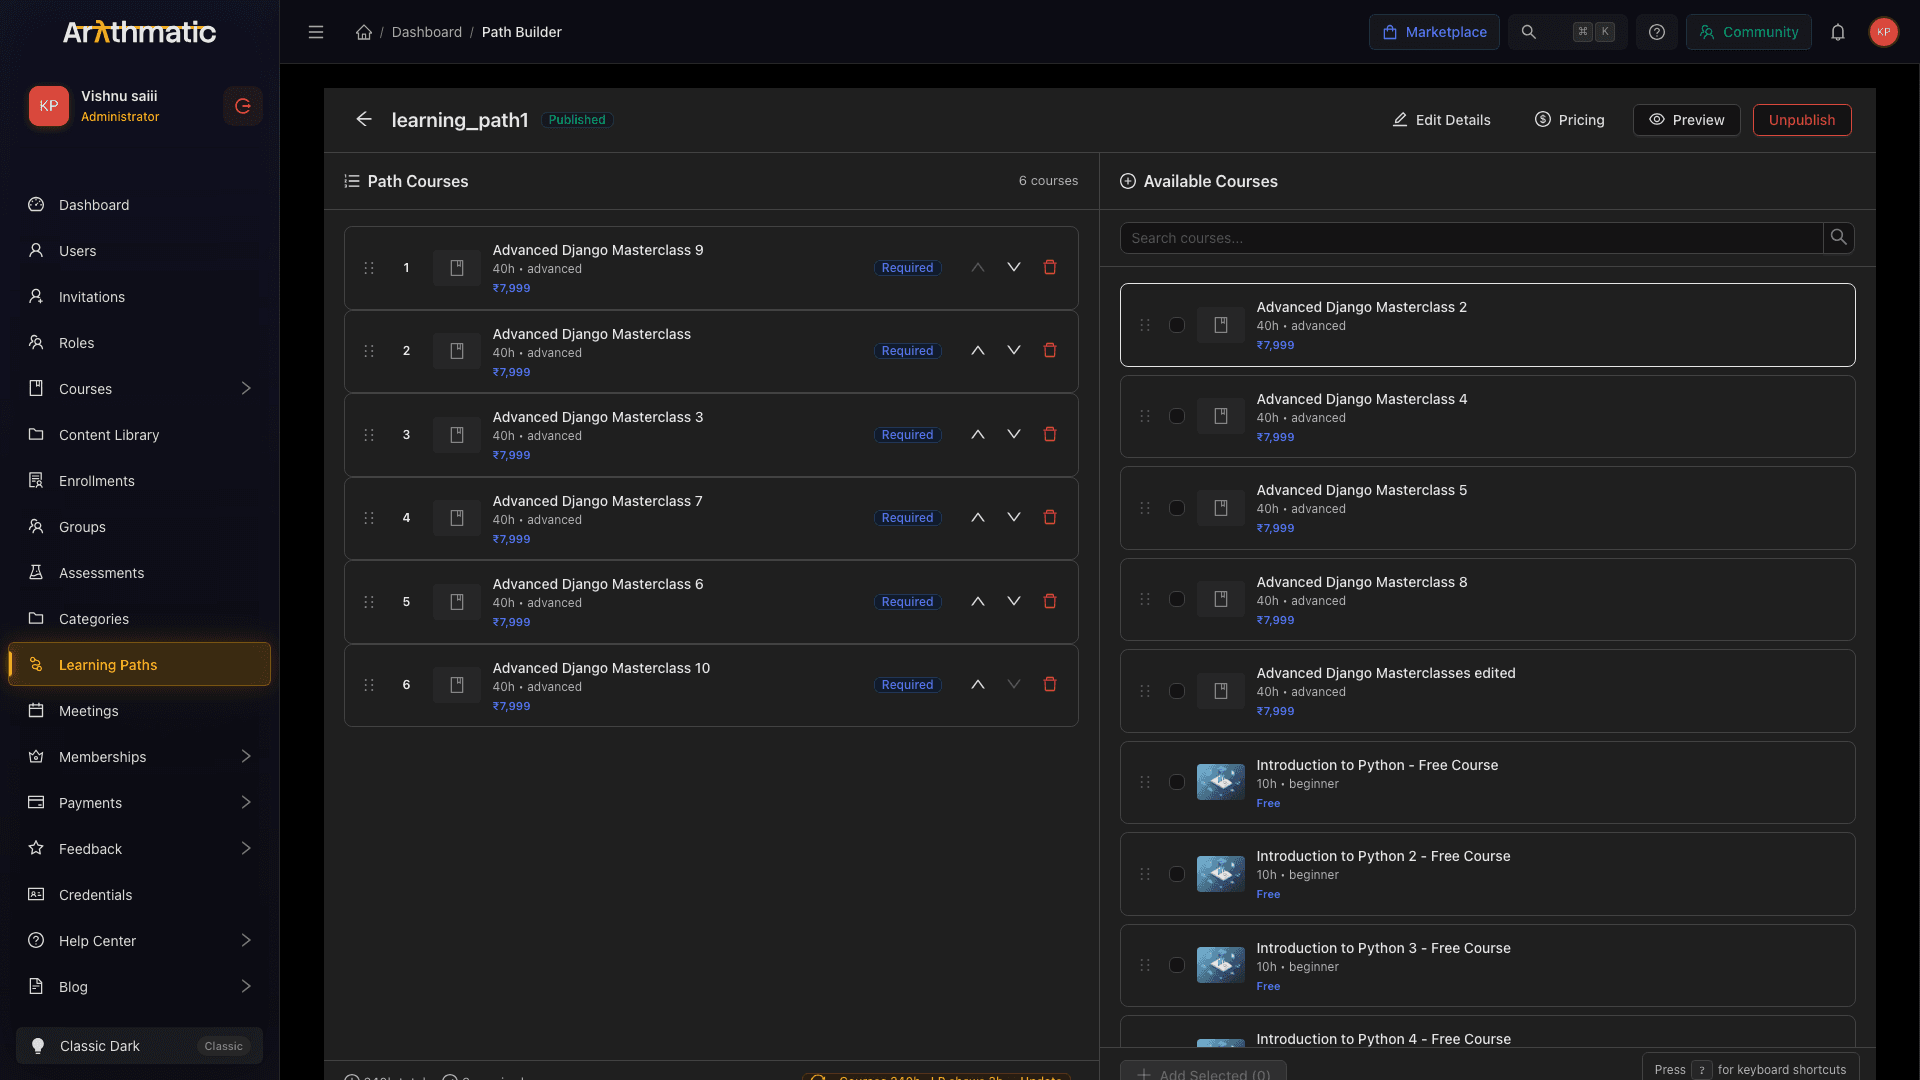
- In the Available Courses panel, click a course row (or its checkbox) to select it. Selected rows are highlighted.
- Select as many courses as you need.
- Click Add Selected (N) at the bottom of the panel.
All selected courses are added to the end of the path. You can then reorder them.
Method 2 — Drag and drop
- Hover over a course in the Available Courses panel — a drag handle appears on the left.
- Drag the course across to the Path Courses panel and drop it.
The course is added and the drop zone highlights in blue to confirm the valid target position.
Searching available courses
Use the search box at the top of the Available Courses panel to filter by course title. The list updates in real time as you type.
Reordering courses
Drag and drop
- Hover over a course in the Path Courses panel — its drag handle appears on the left.
- Drag the course up or down to the desired position. A blue drop zone indicator shows where it will land.
- Release to confirm the new position.
The Save Order button appears in the header once you have unsaved drag-and-drop changes.
Arrow buttons
Each course row has ↑ and ↓ buttons for single-step moves. The top course has ↑ disabled; the bottom course has ↓ disabled.
Saving the order
Click Save Order in the header bar. The position numbers update to reflect the new sequence. If you navigate away with unsaved changes, Arythmatic shows a confirmation dialog — click Leave to discard or Stay to go back and save.
Setting Required vs Optional
Each course in the path has a Required or Optional badge. Click the badge to toggle it:
- Required — learners must complete this course to finish the path. Completion of required courses determines the path completion percentage.
- Optional — the course is part of the path but not mandatory. Learners can skip it without blocking overall path completion.
A tooltip reminds you to click the badge to toggle.
Required/Optional affects completion, not access. In a self-paced path, learners are enrolled in every course at once (required and optional) and can open them in any order — the badge does not lock a later course until an earlier one is done. Enforced one-at-a-time unlocking exists only in Cohort/Batch mode.
The prerequisite flag
Separately from Required/Optional, each course in a path also carries an independent prerequisite flag (surfaced in the path visualization and the enrollment API). It is stored per course and marks a course as a prerequisite for others in the path. Today this flag is informational only — like Required/Optional, it does not gate access in self-paced mode, where all courses unlock together. Treat it as a planning label rather than an enforced lock.
Course information shown
For each course in the path you can see:
- Thumbnail and title
- Duration in hours
- Difficulty level
- Price (Free or the localized price if the course has pricing set)
- Numbered position (the gold circle on the left)
Removing a course
Click the trash icon on the right side of any course row. The course is removed from the path immediately and returns to the Available Courses panel on the right.
Stats footer (left panel)
At the bottom of the Path Courses panel:
| Stat | What it shows |
|---|---|
| Total duration | Sum of all course durations in hours |
| Required | Count of courses marked Required |
| Duration sync nudge | Appears if the sum of course durations differs from the path's estimated duration — click to auto-sync |
Duration sync
If the sum of course durations differs from the path's Estimated Duration (set during creation), a yellow tag appears:
Courses 12h · LP shows 10h — Update
Click the tag to update the path's Estimated Duration to match. This keeps the path detail page accurate for learners.
Pricing warning
If any course in the path has a price set but the learning path itself has no price configured, a yellow warning banner appears at the top of the Path Courses panel:
No pricing set — this path has paid courses but no Learning Path price. Learners will be enrolled for free until you add pricing.
Click the add pricing link in the banner (or click Pricing in the header) to set a learning path price.
Preview
Click Preview in the header to open the path detail page and see how it looks to learners. This is a live view — it opens in the same tab.
Publishing the path
When the path is ready for learners:
- Click Publish in the header.
- If the path has paid courses and no payment gateway is configured, Arythmatic shows an error — configure a gateway in Settings → Payment Gateways first.
- On success, the status badge changes from Draft to Published and the path becomes visible in the learner catalog.
Unpublishing the path
To take a published path offline:
- Click Unpublish in the header (replaces the Publish button once published).
- Confirm the action.
The path returns to Draft status. Existing enrollments are preserved; learners already enrolled retain access to their progress.
Keyboard shortcuts
Press ? on the Path Builder to open the keyboard shortcuts reference. Common shortcuts:
| Shortcut | Action |
|---|---|
| Ctrl/⌘ + S | Save order |
| Ctrl/⌘ + Shift + P | Preview |
| Ctrl/⌘ + Shift + Enter | Publish |
| ? | Open keyboard shortcuts help |
Editing path details
Click Edit Details in the header to return to the details form and update the title, description, objectives, or any other metadata.
Related
- Create a Learning Path — fill in the details form
- Learning Paths Overview — lifecycle and key concepts
- Enrollment & Delivery — manage learner enrollments
Create a Learning Path
Step-by-step guide to filling in the Learning Path details form — title, cover image, difficulty, objectives, and more.
Learning Path Pricing
Configure multi-currency bundle prices for a learning path, toggle between free and paid, and use Auto-Convert for quick multi-currency setup.
