

Inviting Users
How to invite Admins, Instructors, and Learners to your Arythmatic workspace.
Inviting Users
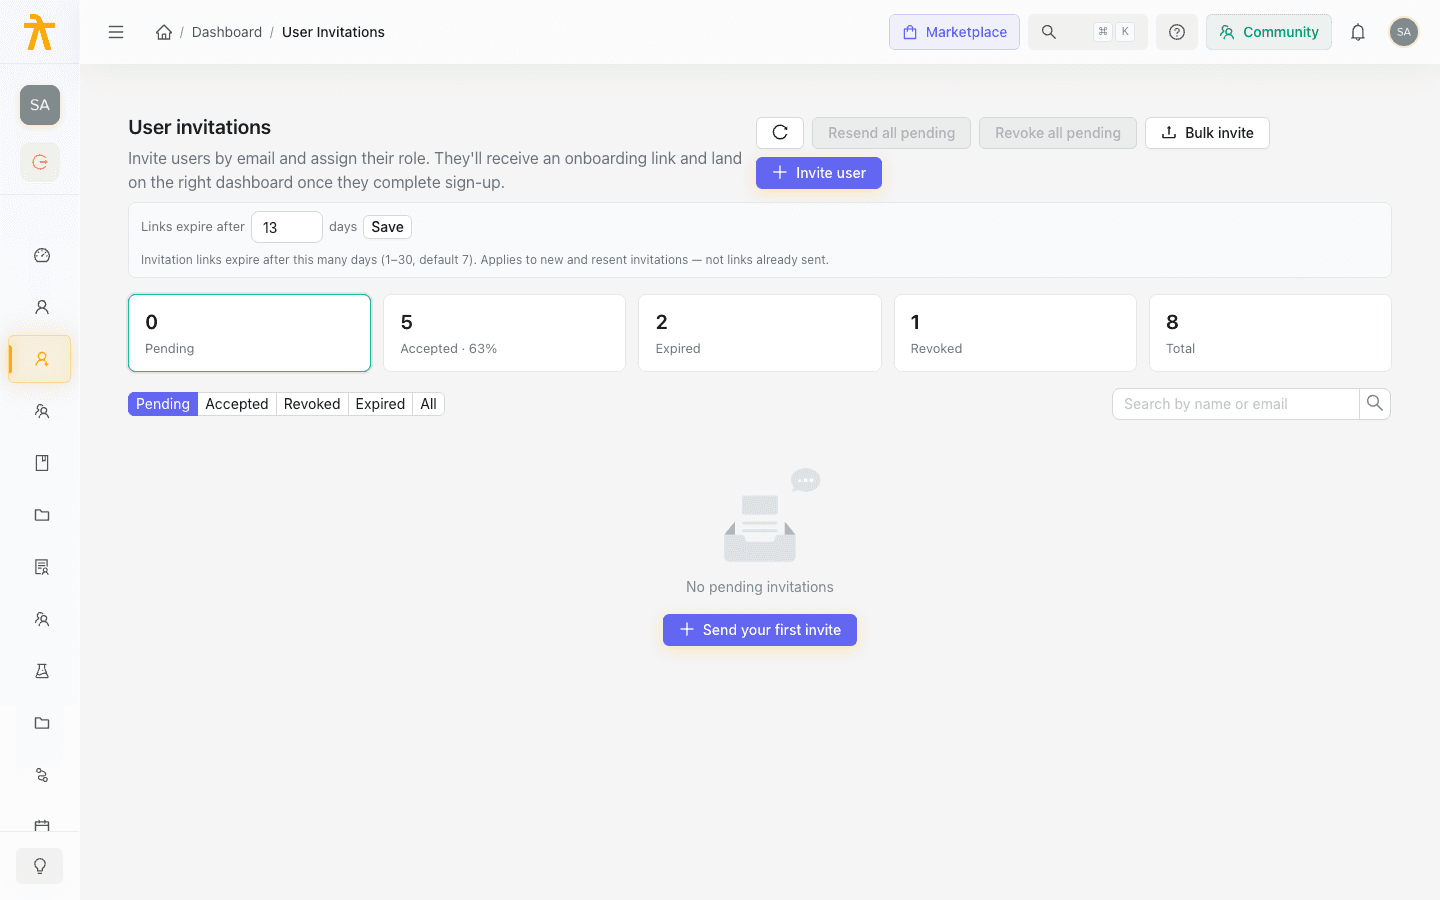
Admin and Instructor accounts are always invitation-only — an Admin must invite these users into the workspace. Learner accounts are created by invitation or, when public catalog access is enabled, via self-registration at enrollment or checkout (a learner can browse the public catalog and create an account when they first enroll in or purchase a course). Sending an invitation creates the user's workspace membership and sends them an email with a link to set their password and log in for the first time.
This page explains how to invite users, what each user experiences, and how to manage the onboarding process at scale.
Before You Invite
Decide on the Role
Before you invite someone, decide which role they need:
| Role | Use when… |
|---|---|
| Admin | The person needs full workspace access — settings, billing, all users, all content |
| Instructor | The person will create or facilitate courses but should not access settings or billing |
| Learner | The person will take courses — they land in the learner portal, not the manage dashboard |
The invite picker offers only these three roles — Admin, Instructor, and Learner. Group Admin is not an invite-time role: it is a school-scoped capability granted separately by designating a user as the administrator of a group (see Roles and Permissions).
See Roles and Permissions for a full breakdown of what each role can do.
Gather Email Addresses
Invitations are sent by email. Make sure you have the correct email address for each user. The email address becomes the user's login identifier and cannot be changed by the user after the account is created (contact support if a user's email address changes).
Inviting a User
Single Invitation
- In the manage dashboard, go to Users in the left sidebar.
- Click Invite User (or Add User, depending on your workspace version).
- Enter the user's email address.
- Select their role (Admin, Instructor, or Learner).
- Click Send Invitation.
The user receives an invitation email within a few minutes. The email contains a link to set their password and activate their account. The link is valid for 7 days by default (an admin can configure this to anywhere from 1 to 30 days under the workspace security settings). If it expires, you can resend the invitation (see below).
Bulk Inviting in a Batch
For onboarding many people at once, use the bulk invite option:
- Go to Users in the left sidebar.
- Open the bulk invite option in the invite dialog.
- Enter the email addresses — paste them directly, or upload a
.csv/.txtfile where the first column is the email address (any other columns are ignored). A single batch is capped at 200 emails. - Pick one role to apply to everyone in the batch (the role you choose is used for every email in the list).
- Send the invitations.
Each email on the list receives its own invitation. There is no downloadable template and no per-row first name, last name, or role — names are set later by each user when they activate, and the batch role is uniform. Failed rows (duplicate email, invalid address) are shown in the results and can be corrected and re-submitted.
Inviting a Learner to a School or Group
Assigning a learner to a school or group at invitation time is a separate flow in the schools module, not part of the main Invite User modal (which only collects email, role, and optional first/last name). If your workspace uses schools and groups (see Users & Groups), open the school and use its Invite Learners action to invite learners by email into that school or group.
The learner is enrolled in any courses already assigned to that group as soon as they activate their account.
The Invitation Email
The invitation email contains:
- Your workspace name as the sender display name
- A personal greeting and a brief explanation of what Arythmatic is
- A Set Password and Get Started button (or equivalent CTA)
- The link expiry notice (7 days by default)
The invitation email is sent from Arythmatic's email infrastructure using your workspace name as the sender. If you want to customize the sender name, see Workspace Settings.
Ask new users to check their spam or junk folder if they do not see the invitation within a few minutes. Add your workspace domain to your organization's email allowlist if delivery is consistently unreliable.
Resending an Invitation
If a user's invitation link has expired or they did not receive the email:
- Go to Users in the left sidebar.
- Find the user — they will appear with a Pending status if they have not yet activated their account.
- Click Resend Invitation next to their name (or from the user's detail page).
A fresh invitation email is sent immediately, with a new link (valid for 7 days by default). The old link is invalidated.
What Happens When a User Activates
When a user clicks the invitation link and sets their password:
- Their account is activated in your workspace.
- They are redirected to the Arythmatic login page.
- They log in with their email and new password.
- Arythmatic routes them to the correct interface based on their role:
- Admins, GroupAdmins, and Instructors land in the manage dashboard.
- Learners land in the learner portal.
- If they were invited into a group, any group-assigned courses are already visible and accessible.
When a group invite is accepted for an email with no existing account — or when a Group/tenant Admin adds a member by email to a group — the workspace silently creates a new account for that email, marks it unverified until the person sets a password, and auto-assigns the Learner role plus the group membership. That is why a new Learner row can appear in the roster right after a group invite, and it counts toward your user total.
Managing Users After Onboarding
Changing a User's Role
You can change a user's role at any time without re-inviting them:
- Go to Users and open the user's profile.
- Update their role in the Roles field.
- Save.
The change takes effect immediately on their next page load or login.
Deactivating a User
To remove a user's access without permanently deleting their record:
- Go to Users and open the user's profile.
- Click Deactivate (or toggle their status to inactive).
A deactivated user cannot log in. Their enrollment history, progress, and certificate records are preserved. You can reactivate them at any time.
Removing a User
Removing a user permanently revokes their access and removes their membership from the workspace. This action is irreversible — if you might need to restore access later, deactivate instead of removing.
Frequently Asked Questions
Can a user be both an Instructor and a Learner? Yes. A user can hold multiple roles simultaneously. If you want someone to be able to both build courses and take courses, assign both the Instructor and Learner roles. They can switch context using the Role Switcher in the manage dashboard.
Can I invite someone who already has an Arythmatic account on another workspace? Yes. Each workspace is independent. Inviting an email address that exists on another workspace creates a separate membership on your workspace. The user's credentials from the other workspace work on yours after they accept your invitation.
What if a user's invitation link expires before they activate? Resend the invitation from the Users page. The new link is valid for another 7 days by default.
Can I see which invitations are pending? Yes. In the Users list, pending (unactivated) accounts appear with a Pending badge. You can filter by status to see only pending invitations.
Can an Instructor invite users? No. Only Admins can invite new users to the workspace. GroupAdmins can invite learners by email into their own group — if the person is not already in the workspace, the invite provisions their account when they accept (see What Happens When a User Activates). A group invite can also carry an invite as admin flag that makes the invitee a Group Admin of that group the moment they accept — but only a tenant Admin may send an admin-conferring invite; a GroupAdmin's invites add ordinary learners only.
Related
- Roles and Permissions — what each role can do
- Login and SSO — how the invitation activates authentication
- Users & Groups — managing schools, groups, and cohorts after onboarding
Roles and Permissions
The three built-in Arythmatic roles — Admin, Instructor, and Learner — plus the Manager and Content Creator permission presets, custom roles, and the school-scoped Group Admin capability.
Users & Groups
Manage the people in your workspace — user accounts, roles, and the groups and schools that organize learners for bulk enrollment and reporting.
